
Ingredients for about 1 kg of miso with a salt content of about 12% by weight
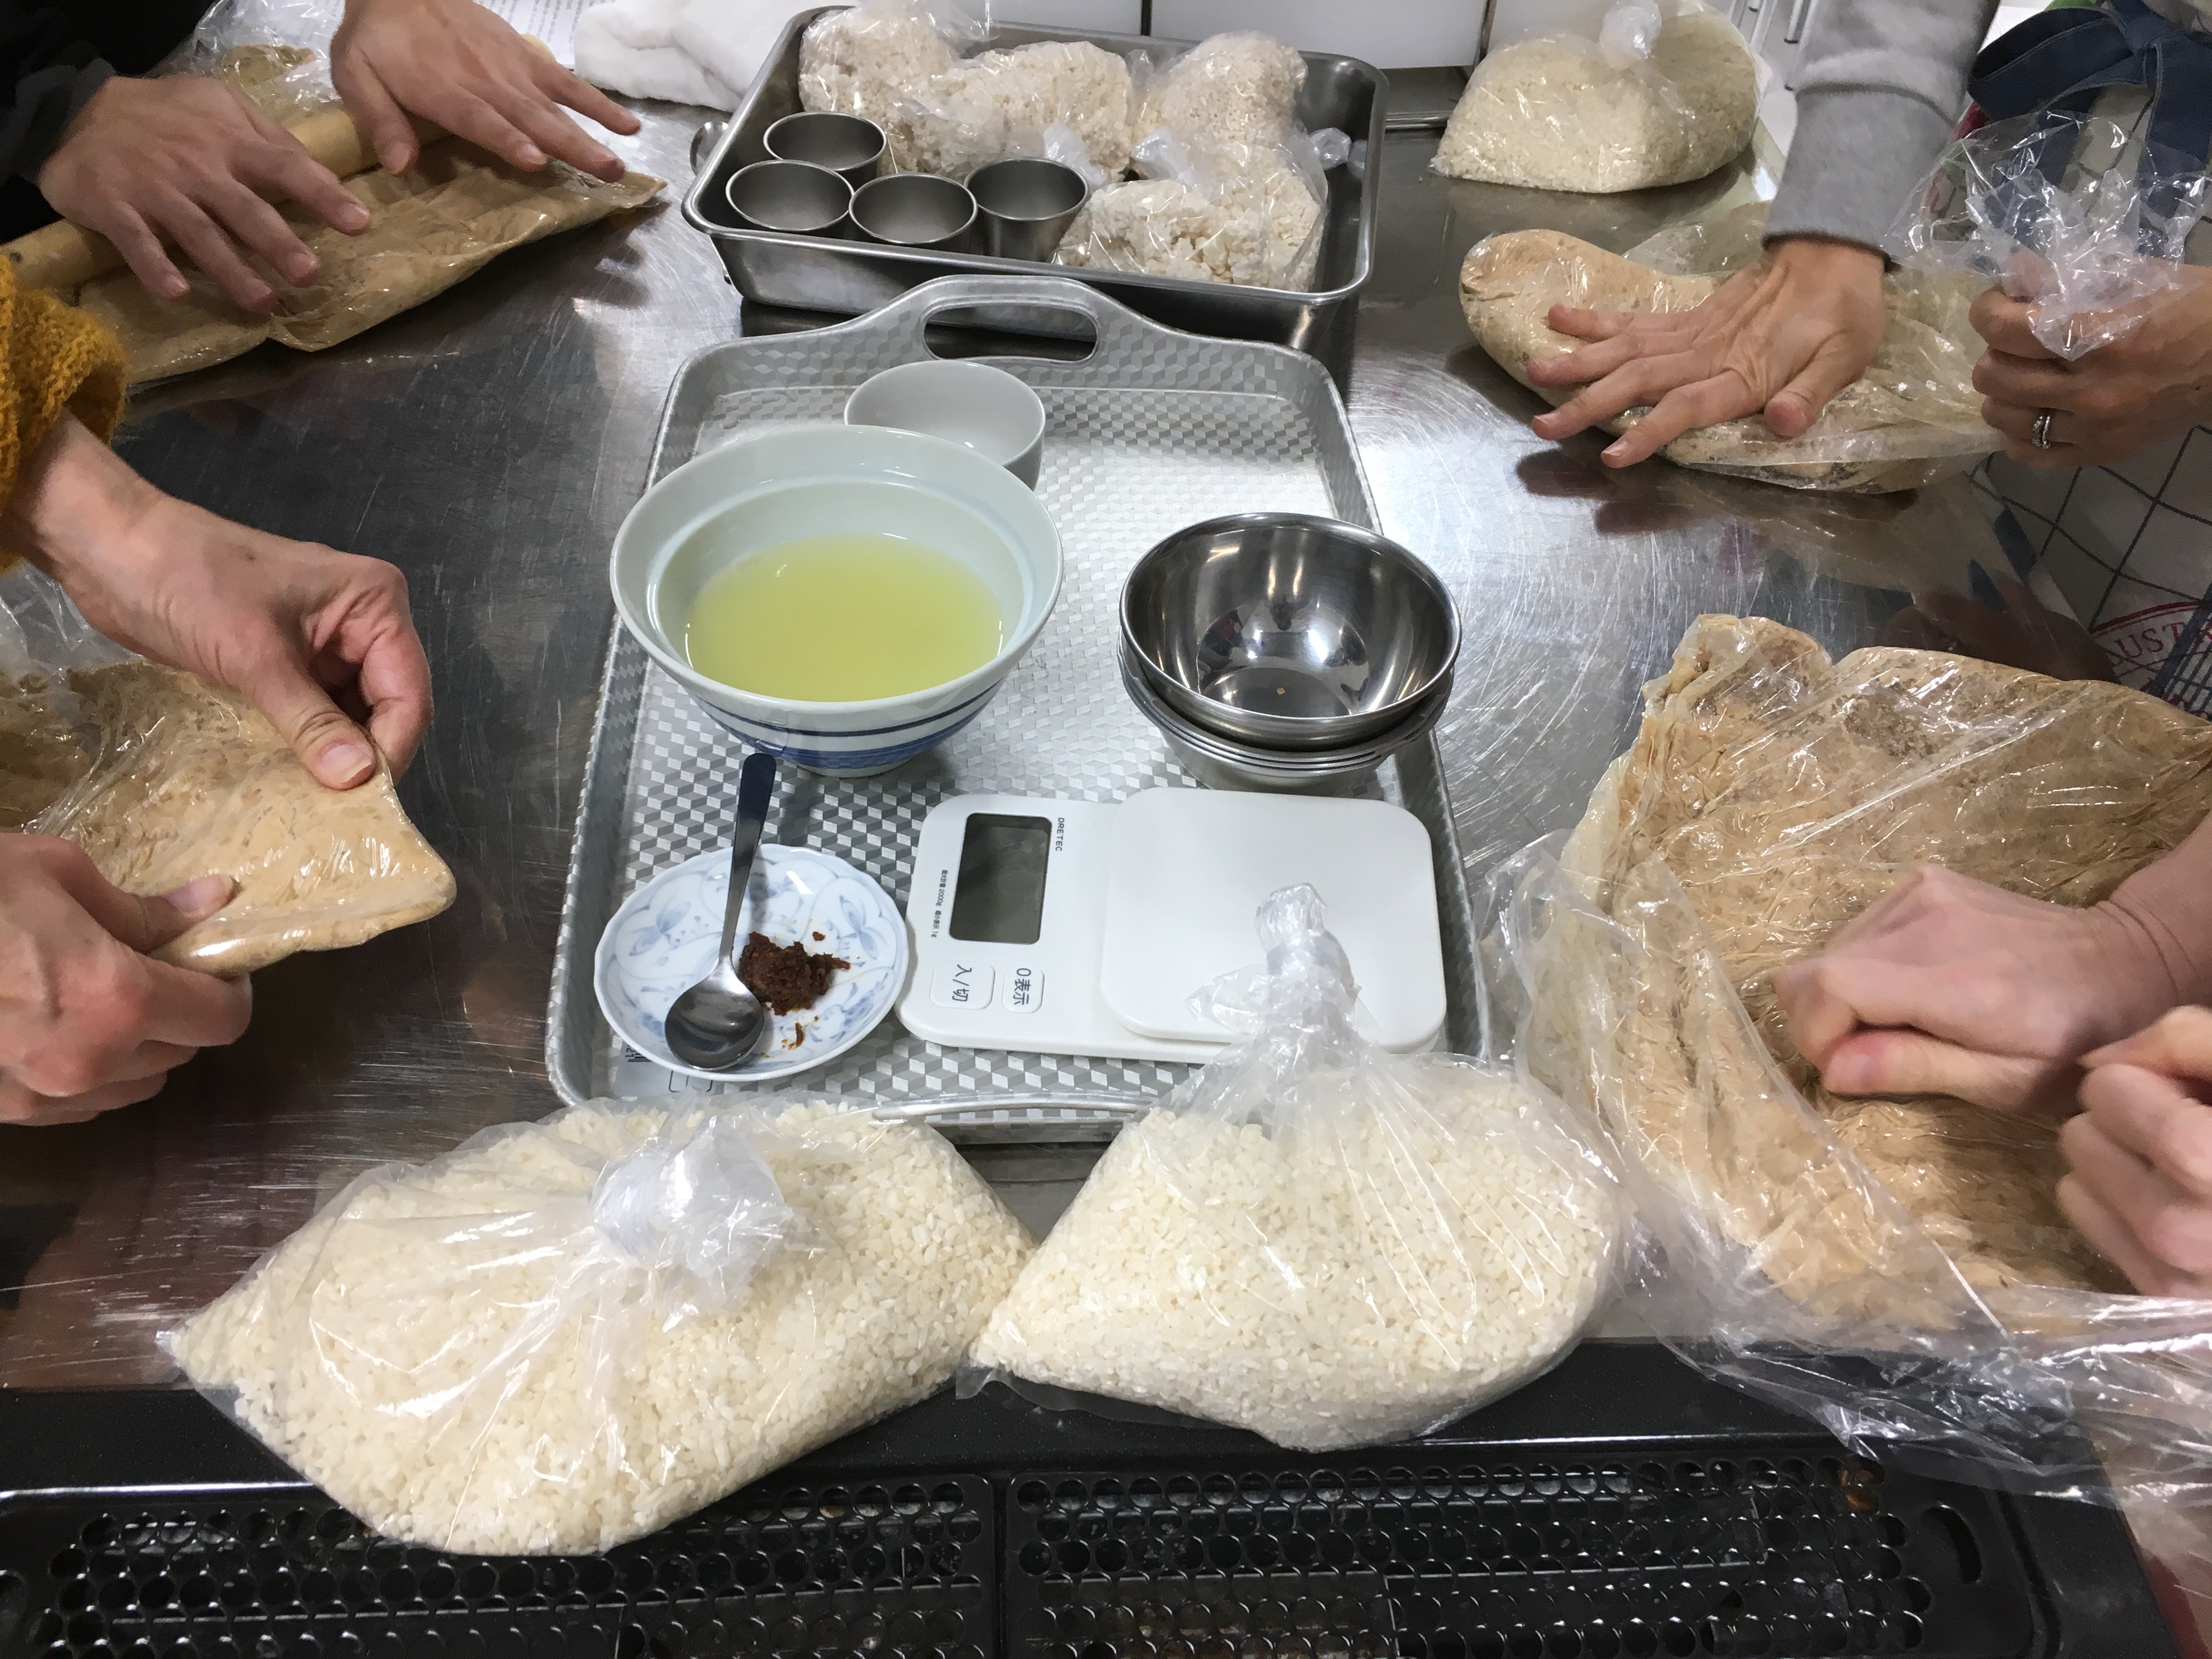
Soybeans (大豆 / Daizu)………………………… 200 g uncooked or 460 g cooked
Kome kōji (米麹 / Kome kōji)………………… 400 g
Salt (塩/ Shio)………………………………………… 110 g
Wasabi powder (わさび粉 / Wasabi kona)…. 1 tbsp
Water (水 / Mizu)…………………………………… 2 tsp
1 Day Ahead of Time
 Examine your soybeans and remove any that are darkened or insect damaged. Use a generous amount of water to give the beans a quick wash. Now soak the beans in water for 18-24 hours. The volume of water should be at least 3 times the volume of beans. Soaking is important to ensure that the beans can be properly cooked to a soft texture, which is critical for good results.
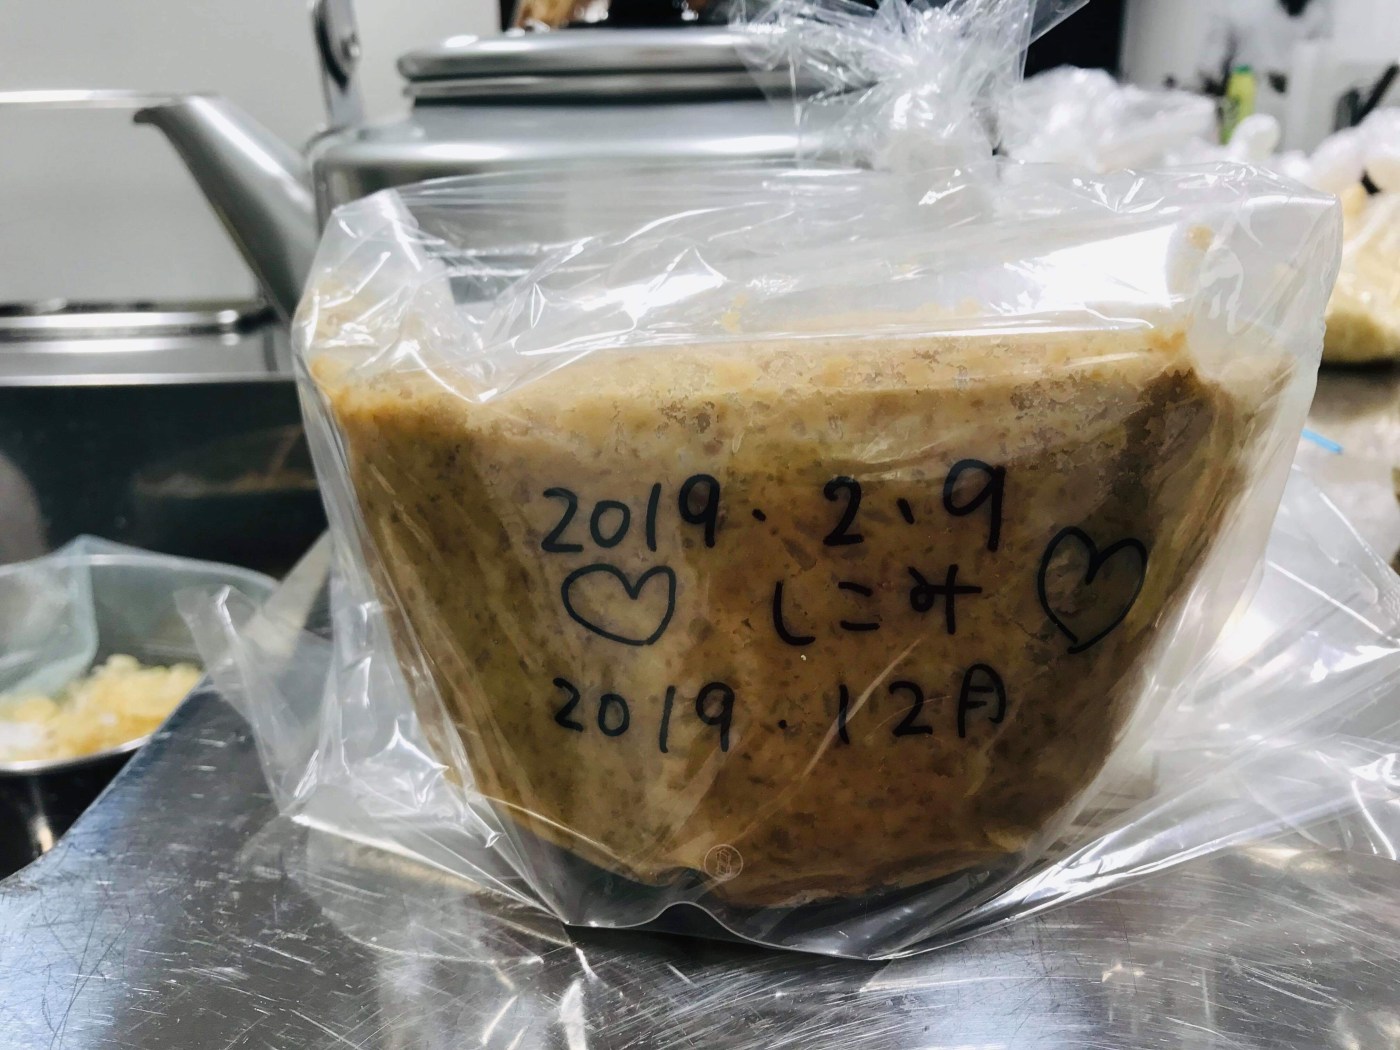
You will need a container to store your miso. Disinfect the container by wiping it with a paper towel soaked in a white distilled liquor, such as Japanese shōchū or vodka.
Miso-Making Day
- Drain the beans and transfer them to a large pot. Fill the pot with water and start heating the pot to bring it to a boil. You will need to boil the beans for about 4 hours. Periodically stir the beans to avoid burning and ensure even cooking. Skim the foam from the surface of the water as the beans cook. Add water as needed to keep the beans completely covered with water. If you use a pressure cooker, the cooking time (the amount of time the heat is on, starting at the point the cooker starts to vent steam) should be about 20 minutes. Cook the beans until they are soft enough that you can easily smash them with your fingers. When you smash a bean, you want it to break down into a paste-like texture – not chunks. Once the beans are soft enough, turn off the heat.
- While the beans are cooking, pour the kome kōji and salt into a large mixing bowl and mix well to make sure the two are evenly incorporated into each other.
- Once the beans are done cooking, immediately start to mash them into a smooth paste. You can do this with a food processor; with a mortar and pestle; by placing the beans into a stout plastic bag and rolling a jar back and forth over them… Do what works best for you. The beans are most easily mashed while they are warm. As you are preparing to mash the beans, place only the beans into the food processor, mortar, plastic bag, etc. Add the cooking water as necessary to achieve a smooth texture.
- Once the beans are mashed into a smooth texture, gradually add the mixture of kōji and salt, and mix it into the bean paste. The key here is to get the kōji and salt evenly distributed throughout the bean paste. This is important for preventing the development of mold.

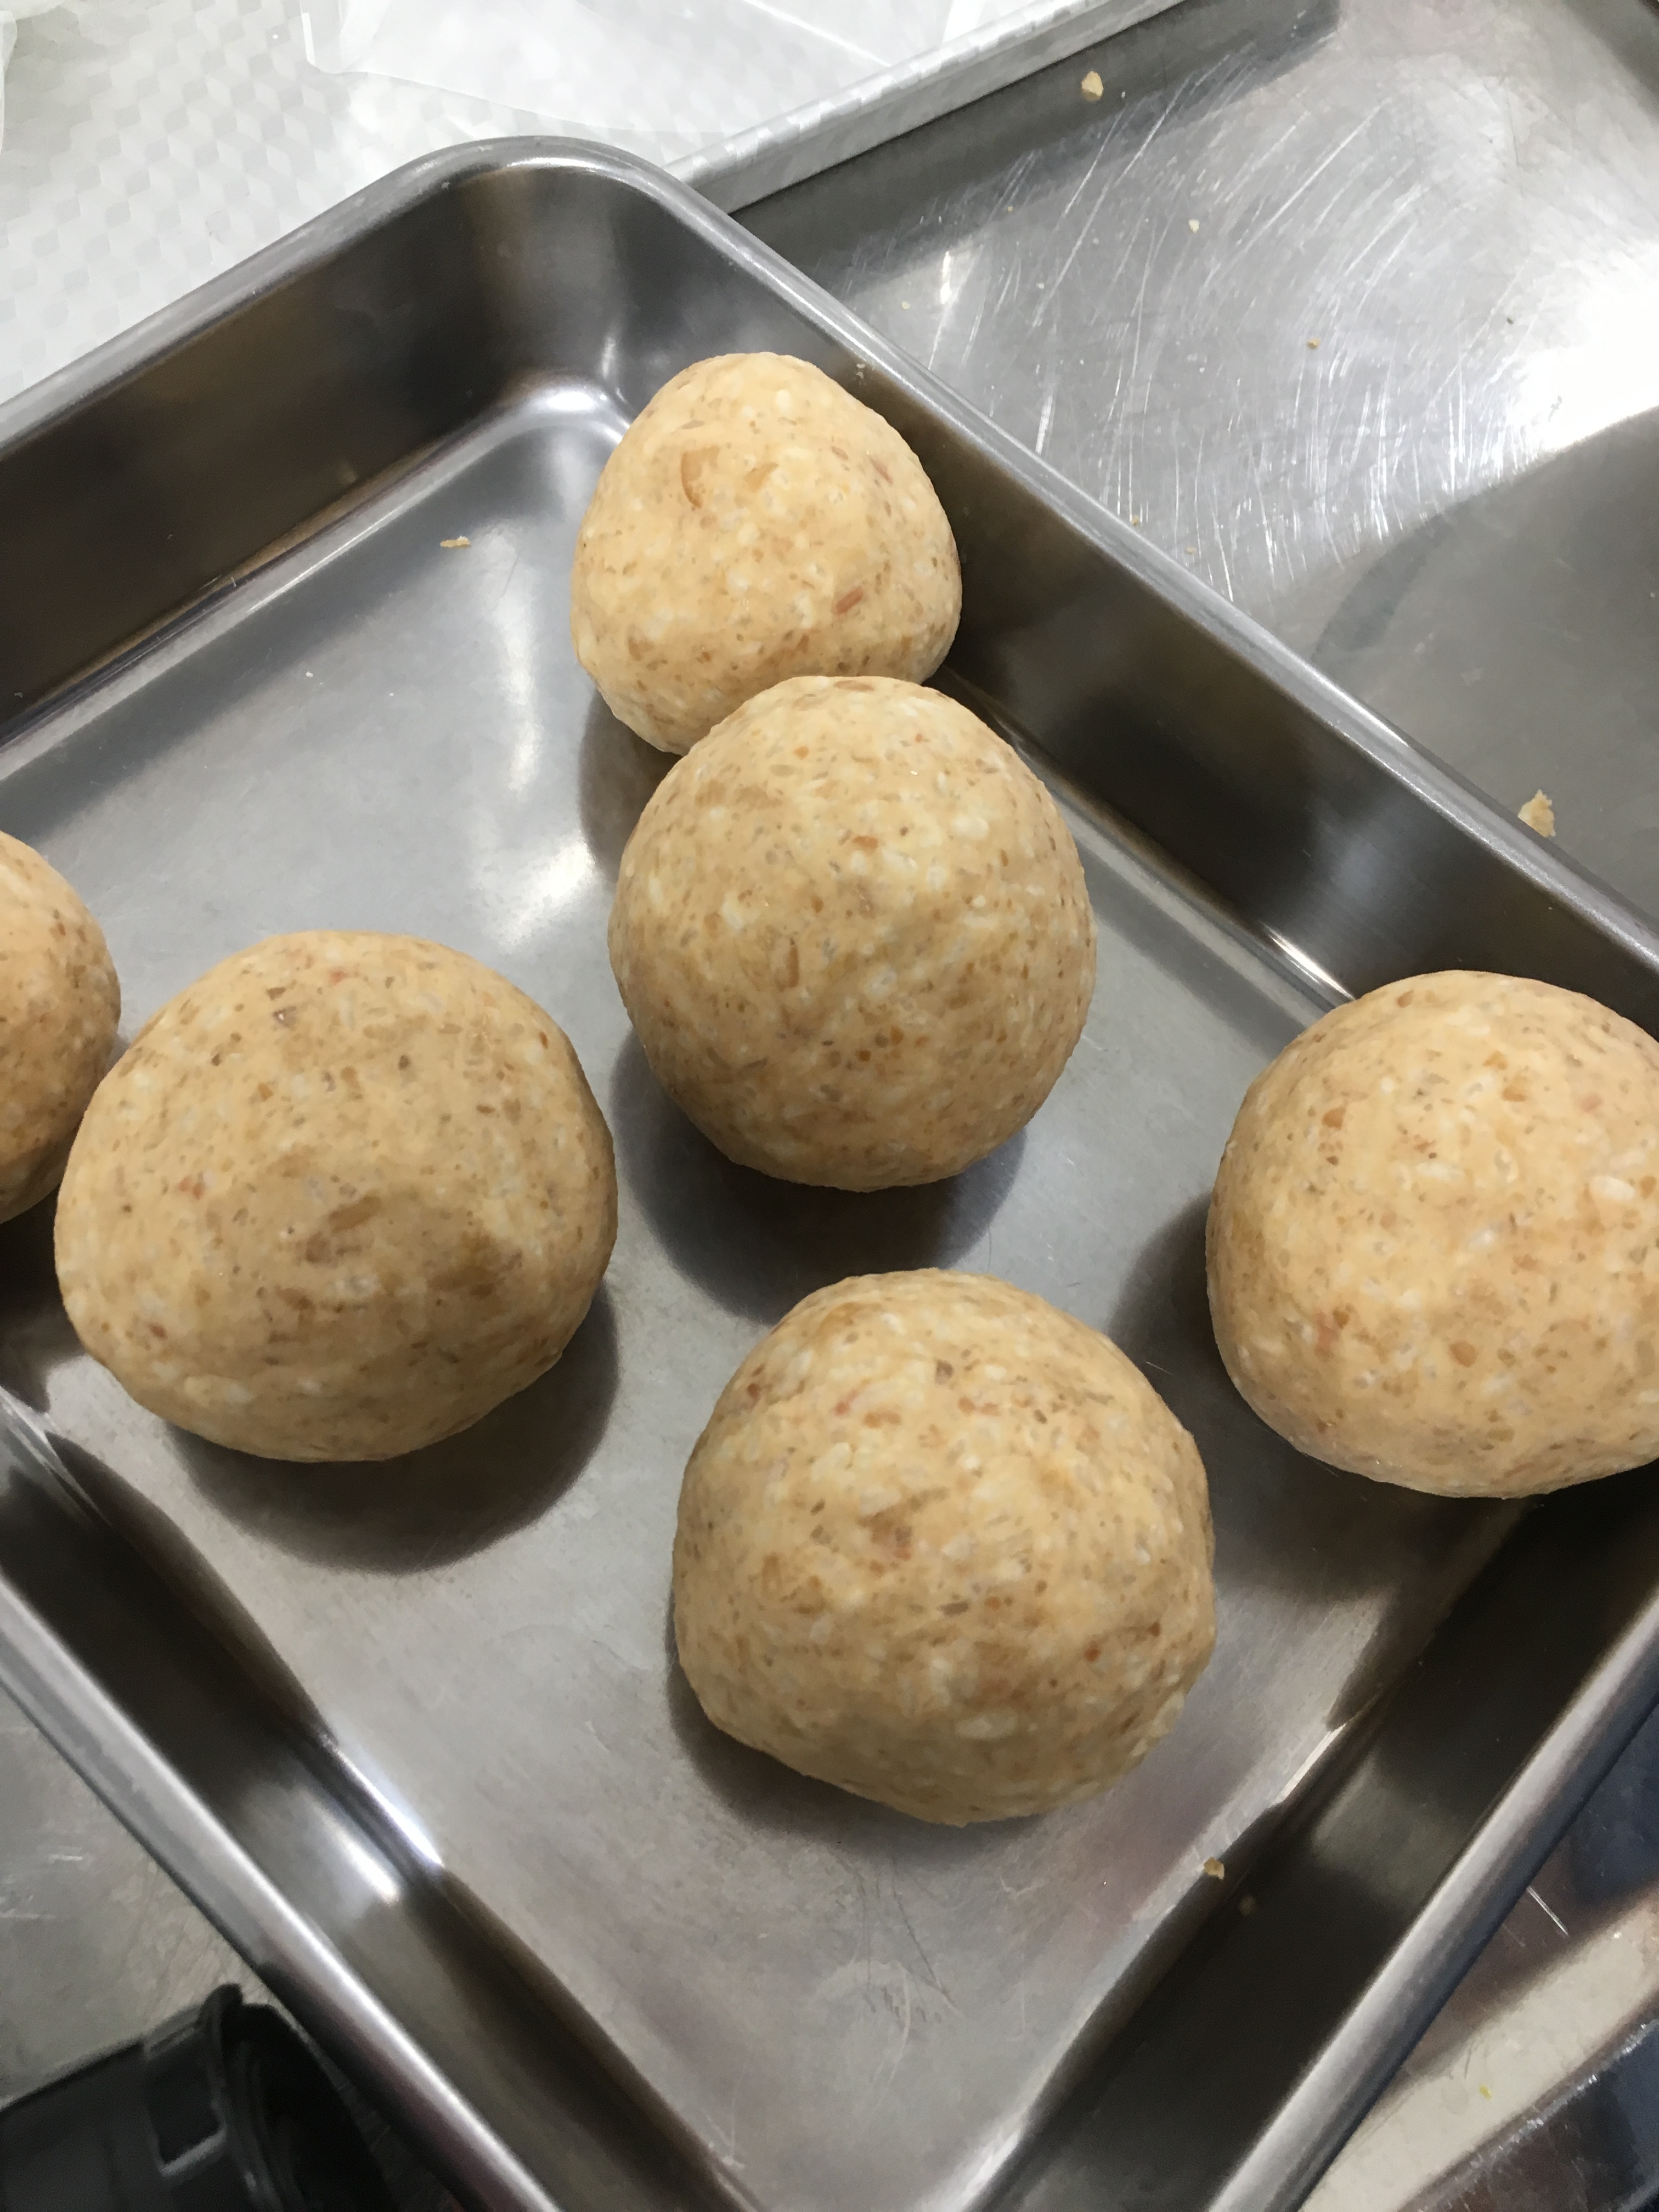
- Use your hands to form the soybean-kōji-and-salt paste into balls each about the size of a tennis ball. Put some strength into your hands as you do this, so you can make balls that are dense and do not have any air pockets.

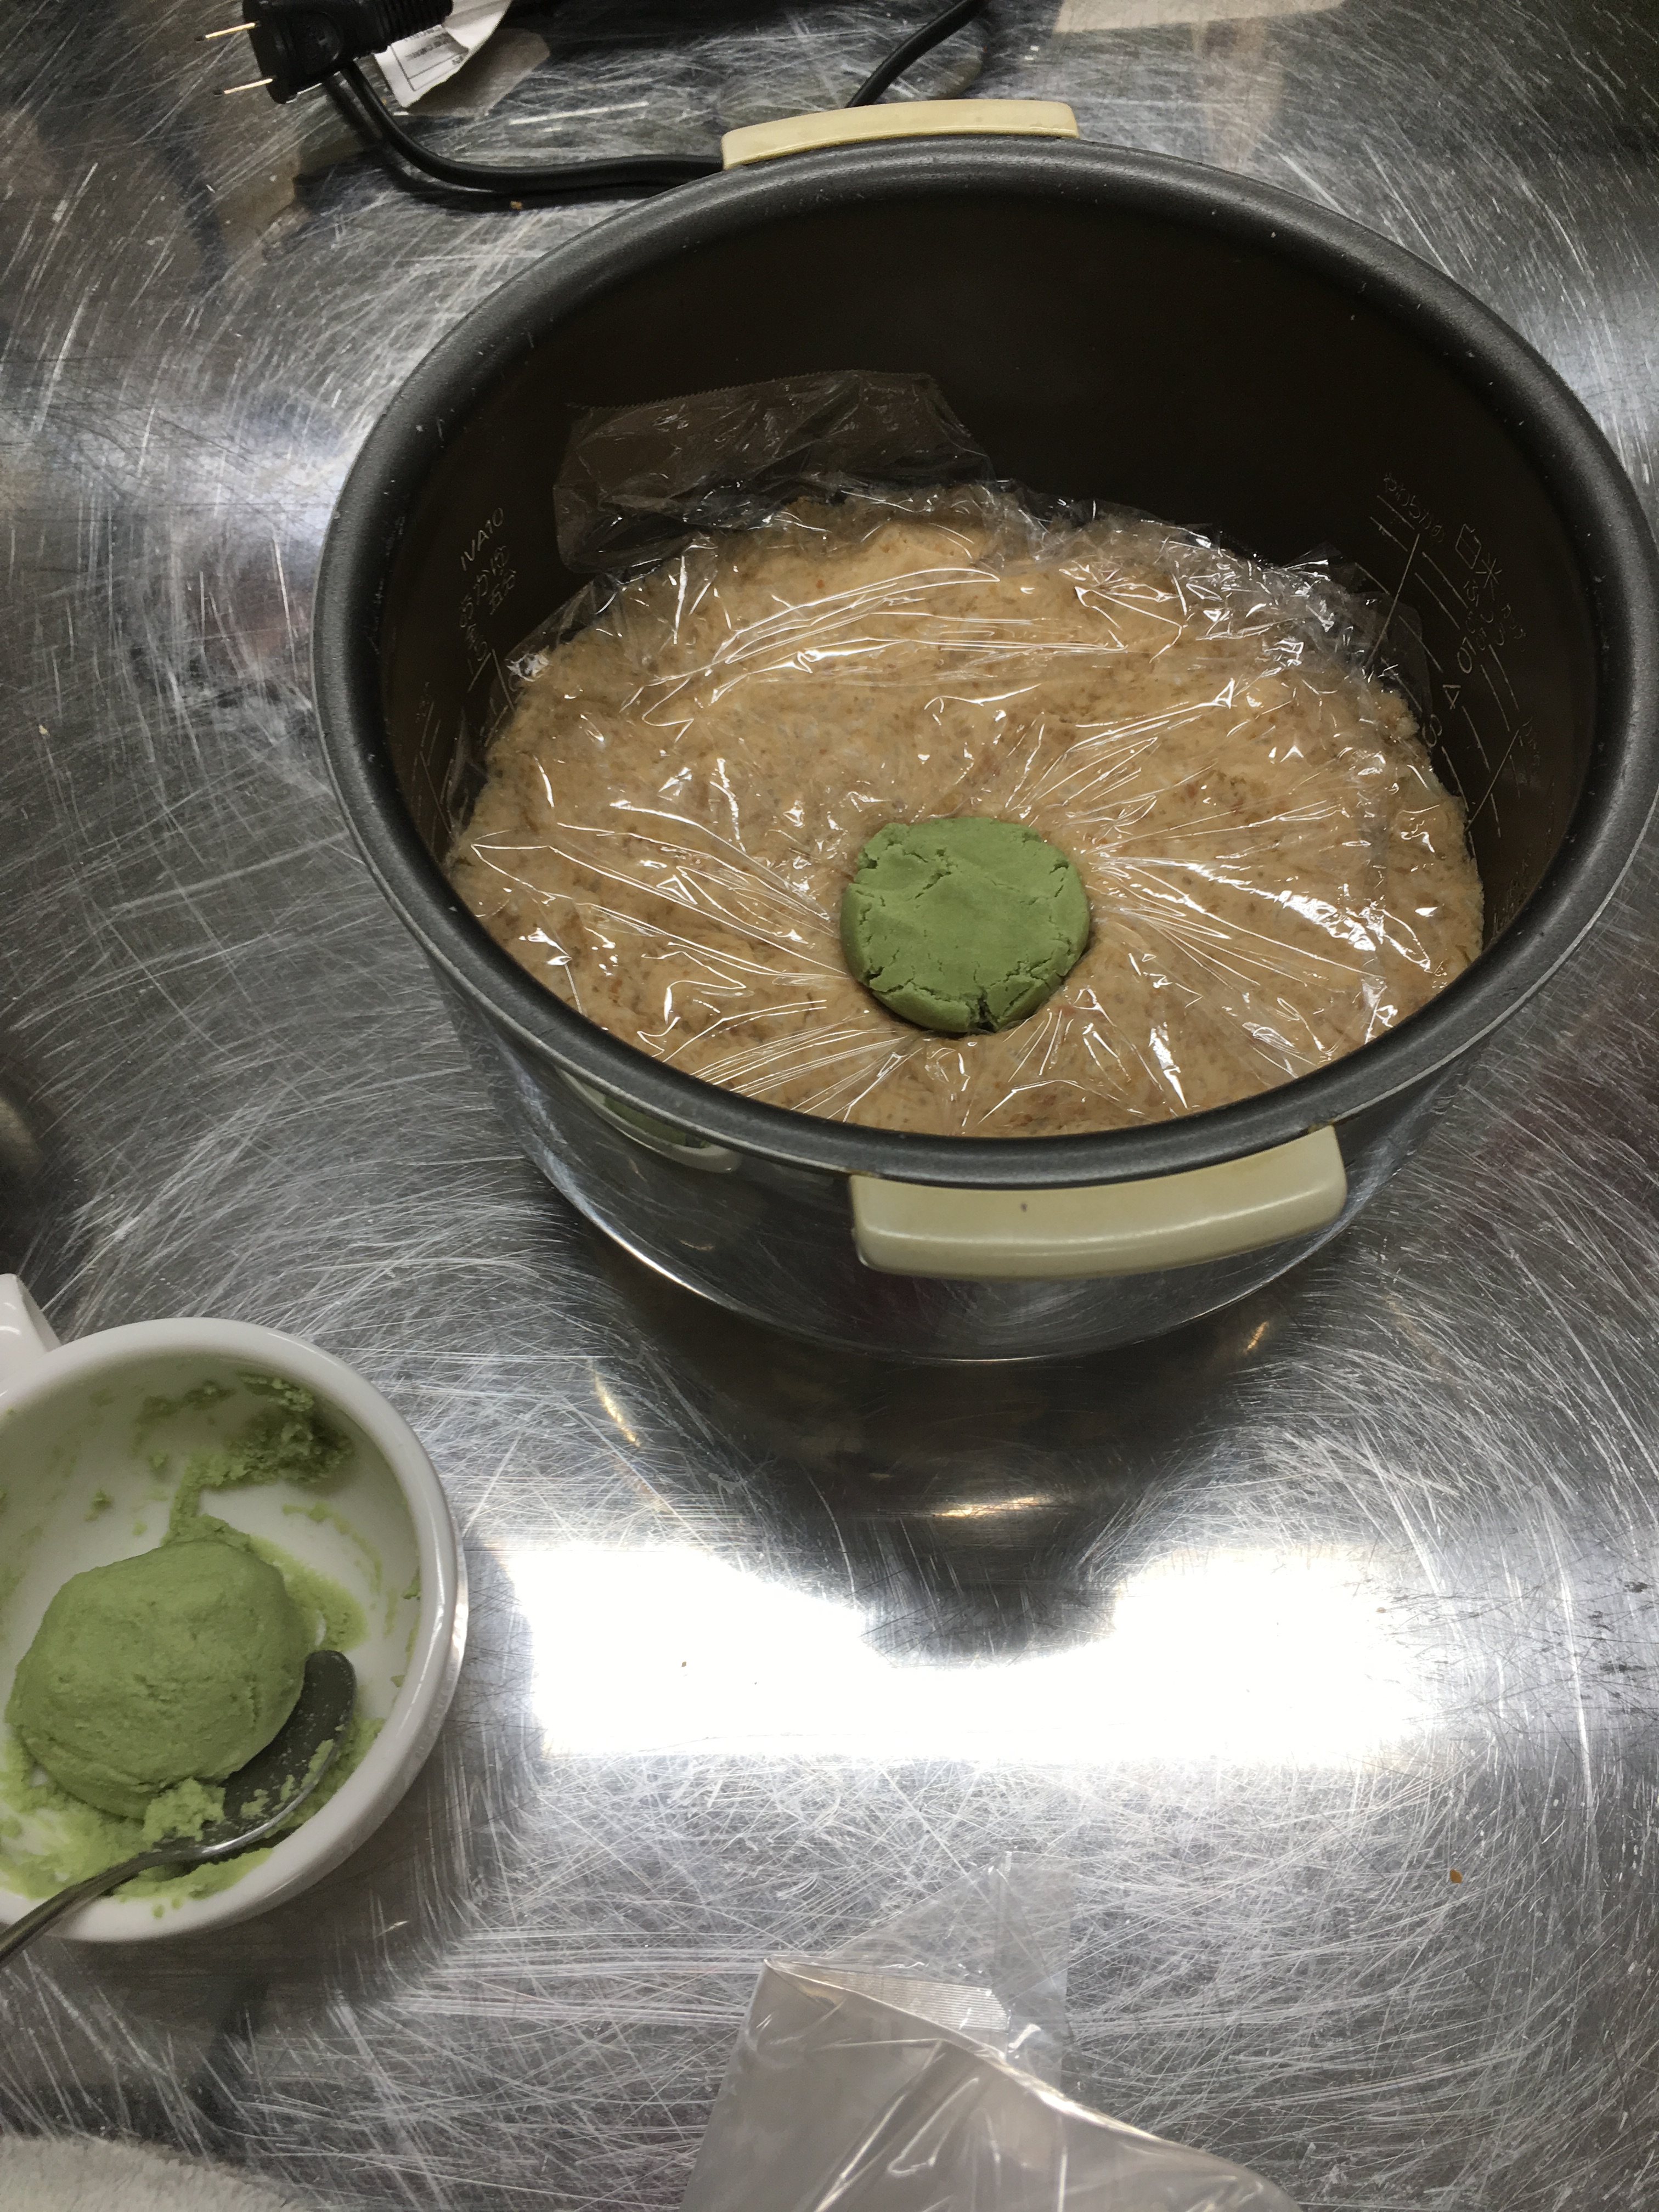
- Sprinkle some white distilled alcohol into the storage container and use a paper towel to wipe the inside of the container. Begin stuffing the balls into the container. Press the balls in (Yes, this will cause the balls to break down.) tightly to make sure there are no air pockets. When you get all of the paste into the container, level off the surface of the paste. Place a sheet of plastic wrap directly on top of the paste. Use a sheet that is large enough to run up the inside of the container.
- Add 2 tsp of water to 1 tsp of wasabi powder and mix well to create a paste. Form the paste into a ball and place the ball in the middle of the plastic wrap. (Alternatively, you could spread a thin layer of sake kasu (lees) on top of the soybean paste before covering the paste with plastic wrap.) Cover the container and set it aside in a location where there is no direct sunlight.

- After 6 months, the soybean paste will have darkened and will be producing a typical miso aroma. It will not yet be miso, but you can begin using it at this time. After 10 months, the saltiness will have mellowed and you will have miso. As fermentation proceeds, the flavor will change. Once your miso has achieved the flavor you want, put the storage container into a refrigerator. Cooling will slow the fermentation and changes in flavor.
- If your miso happens to develop any mold, simply remove it. The overall quality of your miso will not be affected.
Making Miso in a Resealable Plastic Bag
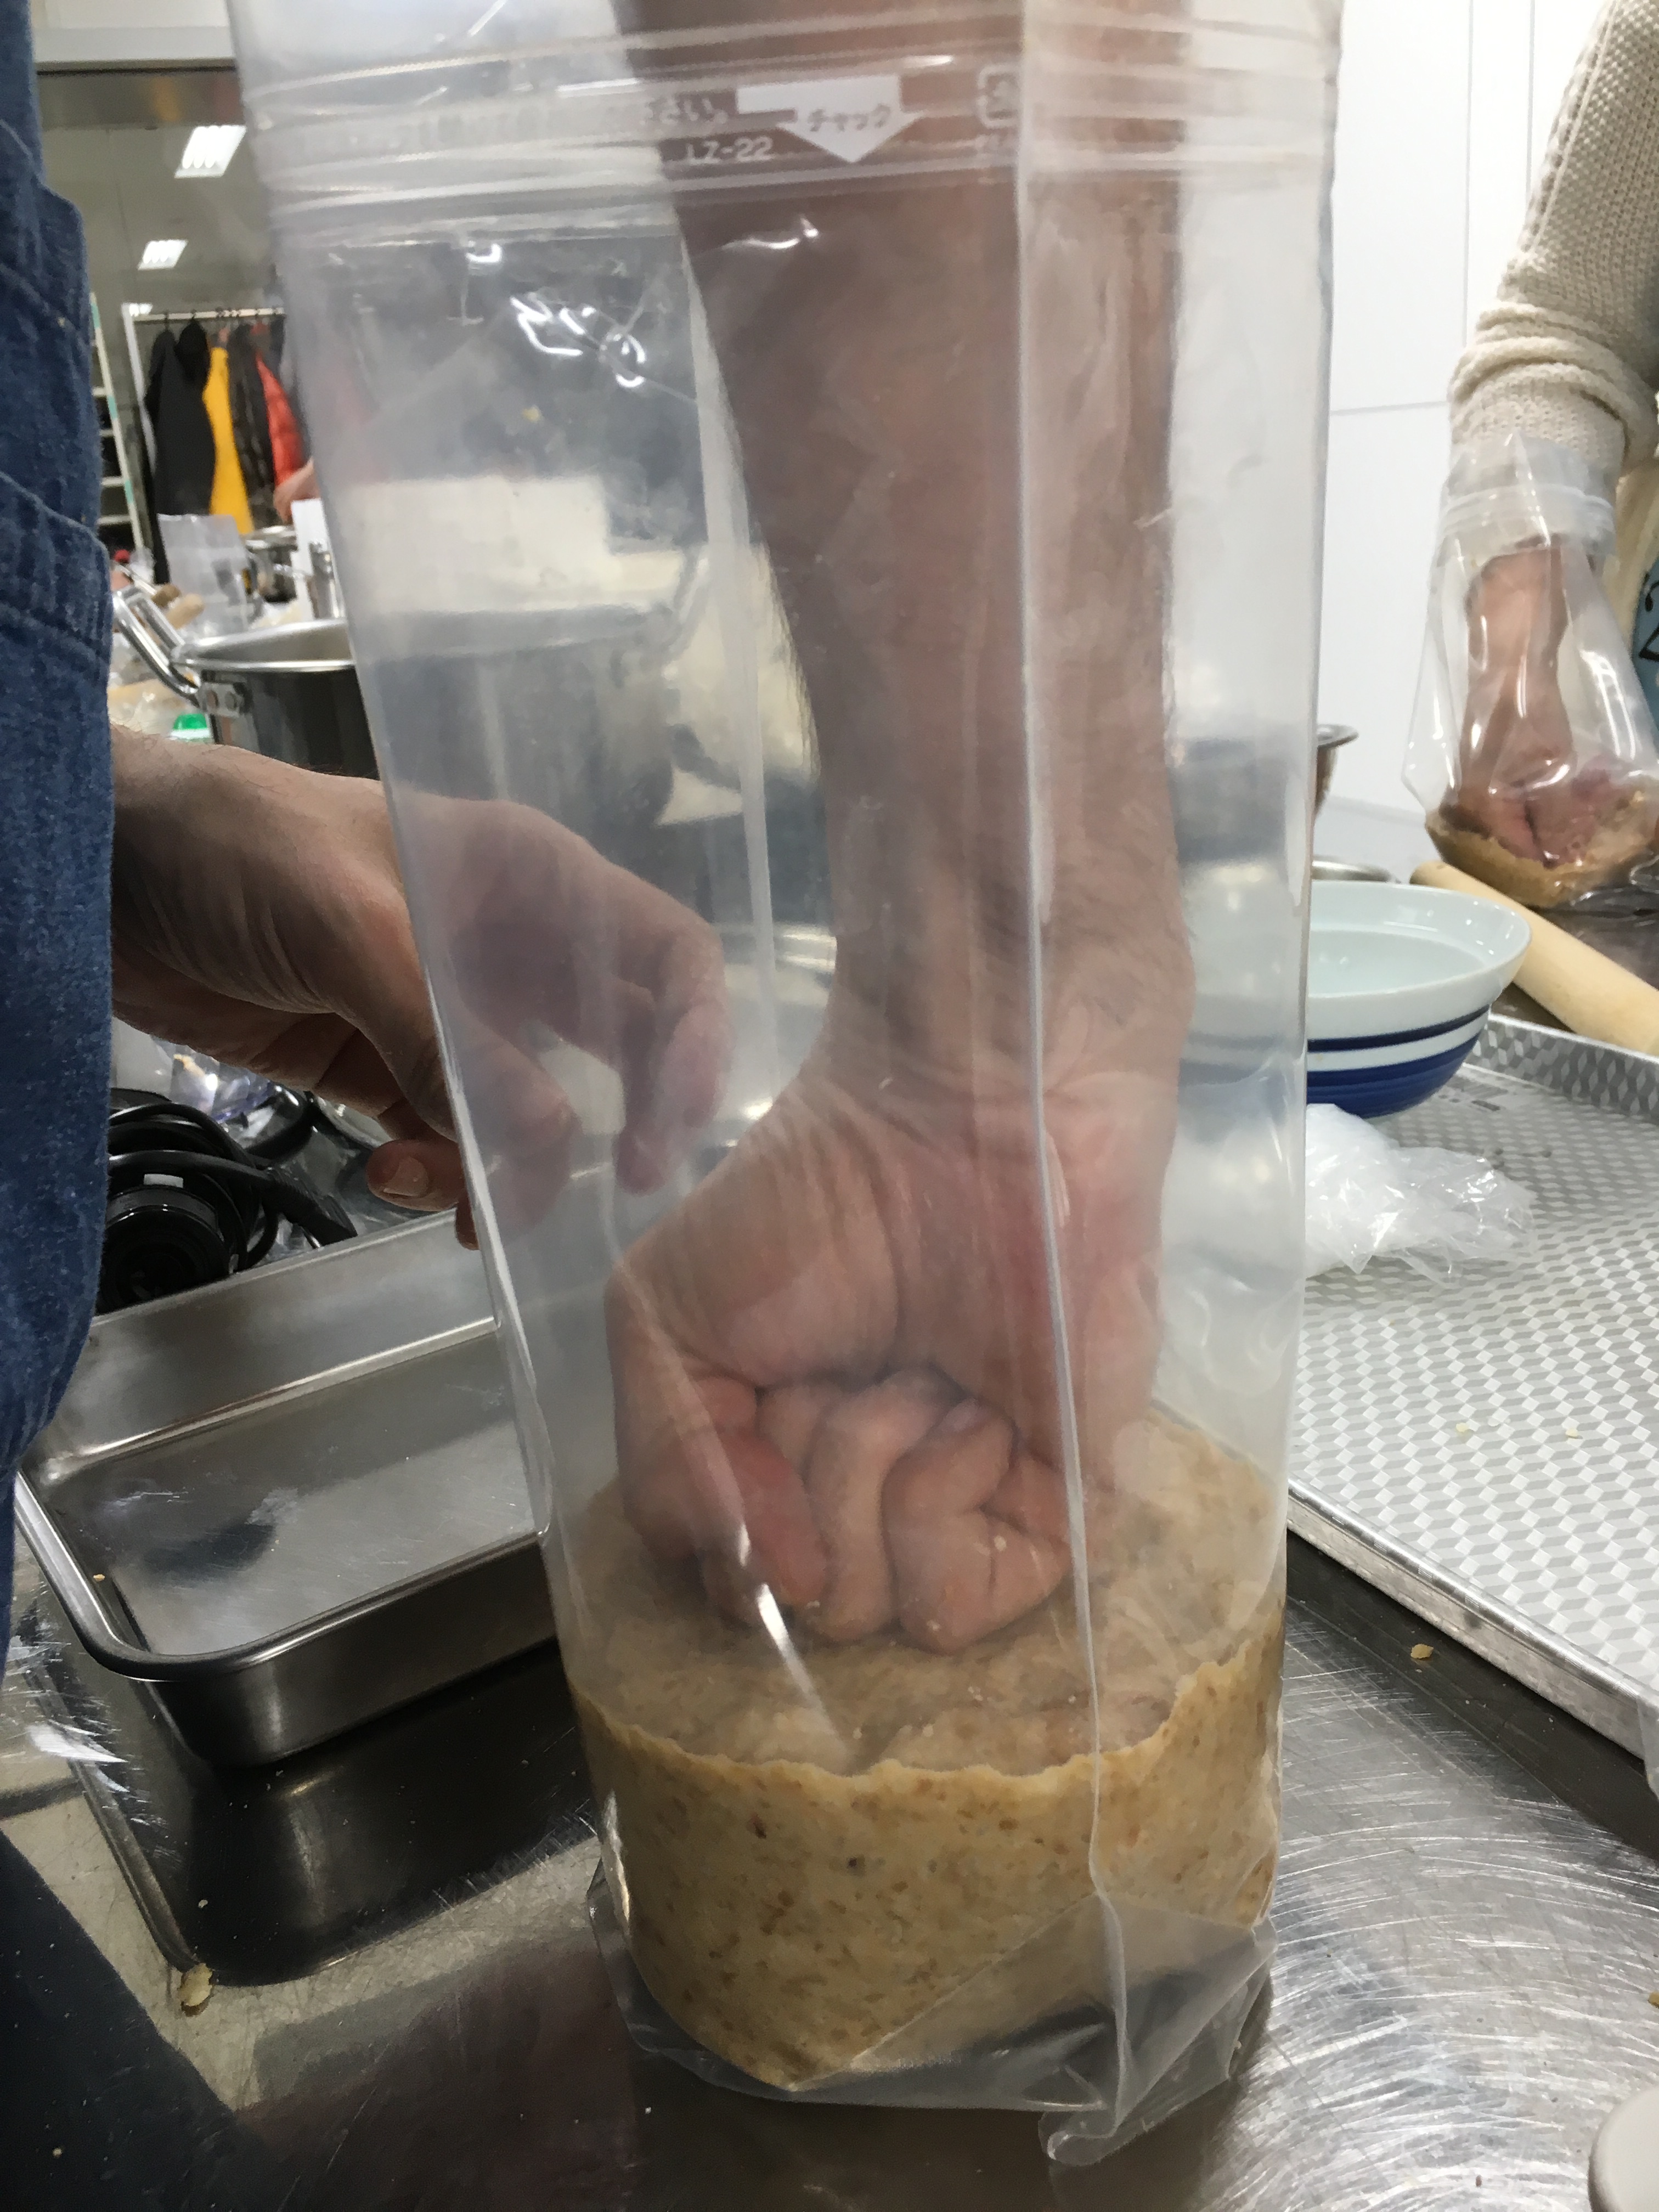 Miso can also be made in a resealable plastic bag. A heavy-duty option, such as the Lamizip brand, is best. After stuffing the soybean paste balls into the bag – again, taking care to exclude any air pockets – turn the bag upside down to press out as much air as possible, and then seal the bag while it is still upside down. Put the sealed bag into another plastic bag, and then set the paste aside as instructed above, but leave the bag upside down. This is to help prevent the development of mold. As fermentation proceeds, the bag will swell with gas. Open the bag periodically to release it and then reseal the bag. Once enough liquid (called tamari) forms in the bag to cover the paste, the chance that mold will develop will be greatly reduced and it will be fine to leave the bag right side up.
About Wajima Sea Salt
The preferred salt for the recipe above is Wajima no Kaien (わじまの海塩, which means Wajima sea salt) is named for the city of Wajima on Ishikawa Prefecture’s Noto Peninsula, an area renowned among Japanese for the quality of its seafood. The Noto Peninsula is surrounded by the Sea of Japan and Bimi & Kenko, the maker of Wajima no Kaien, uses water from the Sea of Japan for its products. To ensure purity, it draws water not from the immediate coast, but instead from near Hegurajima, a tiny island about 50 km north of the tip of the Noto Peninsula. To make its sea salt, Bimi & Kenko places seawater under lamps that provide a constant source of low heat to slowly and steadily evaporate water and promote the growth of salt crystals that readily melt. Wajima no Kaien has a balance of sodium, magnesium, zinc, and other minerals that makes it well-suited for fermentation, and easy on the body. It’s also very tasty on its own. Chef Tateno uses Wajima no Kaien to make miso because she has determined, based on years of experimentation, that it produces the best flavor.
 Recipe Developed by Chef Machiko Tateno

Leave a comment